Unlocking the Big Mac

Before we start, I need to warn you of a few things:

  1. I hardly (i.e. next to never) eat “American food”
  2. I eat fast food (McDs / Burger King / KFC / etc…) probably once every two years, barring breakfast hash browns and ice cream. Why is the ice cream so good at these places??
  3. I’m not a burger connoisseur so don’t expect any knowledge of the so-called perfect burger
  4. I will be possibly one of the last people you can expect to find eating a burger, because I get bored halfway through
  5. I don’t even like meat that much except under special circumstances

But I have a dirty secret. I dream about eating Big Macs.

I really like the sauce. The last time I ate a Big Mac was sometime earlier this year (before that, it was probably 3-4 years ago). It was pretty disappointing, all except… the sauce. Yes, I felt kinda sick after finishing the burger. As anticipated. But I had my special Big Mac sauce fix, which I thought would tide me over maybe another 3 years?

Photo 19-11-2013 15 31 55Photo 19-11-2013 19 57 14Photo 19-11-2013 19 38 13Photo 19-11-2013 20 06 44

Until Bigfoot suggested we have home made burgers one night. Home made burgers? pshaw. Not interested. Never had a good one. Whatever, burgers. Boring.

He said home made burgers are the food of kings, and that it would be different. ***

I said whatever, burgers are boring and make me feel sick after I finish eating them.

He said just try come on pleaaasseee. And agreed that I could be in charge of the sauce.

I said hmm…. could that sauce be Big Mac sauce, you say?

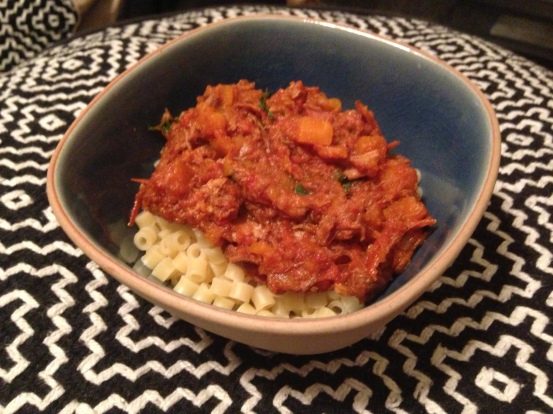
A deal was struck. Lamb burgers with cheese, charred onions, rocket, and Big Mac sauce. Yes, I know it sounds trashy alongside all those nice fancy words like “lamb” and “charred” and “rocket”. Boo to you too. No sauce for you.

Photo 19-11-2013 20 14 08

As I rolled around my living room floor groaning at how the burger overstretched my poor stomach, I realised that the recipe for Big Mac sauce had to be posted. Not for anyone else, because there are enough so-called secret sauce recipes out there.But for me, so I won’t forget it, and so I can eat my sauce happily without visiting McDs, thereby bypassing the after-fastfood-I-am-going-to-throw-up-feeling. Yay me!

I’ve also included the burger recipe because it was rather good, if my meat-ambivalent tastebuds dare say so.

Photo 19-11-2013 20 16 44

Big Mac Sauce

Based on a survey of ‘secret sauce’ recipes around the web… and then I used different ingredients like wholegrain mustard. It isn’t a totally faithful reproduction, rather just a reproduction that tastes similar, that we enjoyed

2 tablesp Kewpie mayo
1 tablesp Branston pickle
2 teasp wholegrain mustard
1/4 onion, chopped finely
1 clove garlic, chopped finely
1 teasp paprika / chilli powder

  1. Mix all the ingredients. Taste and adjust. Leave to sit for at least 15 minutes so the onion softens

Lamb Burgers

Makes around 5 large burgers. Bigfoot’s own recipe.

500g minced lamb
1 1/2 onion
3-4 cloves garlic
2 teasp smoked paprika
2-3 teasp dried mint
1 teasp cumin
1 teasp dried oregano
A little Salt
Black pepper + salt to coat

  1. Chop the onion and garlic in a chopper. Fry them off until fragrant in a little oil.
  2. Mix everything into the lamb, without over handling it. Shape into patties. Leave patties in the fridge to firm up, for around half an hour.
  3. Heat up your grill pan until it is pretty scary-hot. Add a generous helping of black pepper and a bit of salt to the outside of each patty on both sides (amount is to your taste). Then cook them over the grill, flipping regularly.

*** yes I have taken poetic license but you get the gist.


Lamb and Carrot Ragu

Not as hard as it seems. Really, I was surprised at how tasty it was considering I made it, and I’m bad at meat.

Lamb and Carrot Ragu

Lamb and Carrot Ragu

Inspired by a brunch I had somewhere in North Melbourne, but the recipe is mine

4 pieces round lamb bone chops – it has to be something with a bit of bone in it
8 tomatoes, chopped
2 carrots, diced small
1 red onion, chopped
5-7 cloves garlic, chopped
1.5 tablesp tomato paste
1 tablesp balsamic vinegar
1/2 teasp cumin seeds
3 bay leaves
1/2 teasp black pepper
Salt and sugar to taste

A pressure cooker

  1. Brown onion and garlic in some oil. Add the cumin seeds.
  2. While while that’s browning, chop the carrots. Then add the carrots.
  3. Same for the tomato – while the carrot browns, chop the tomato. Then add the tomato and a little salt.
  4. Mix it around and then close the pressure cooker lid. Pressure cook on high for around 15 to 20 minutes.
  5. Clean the excess fat off the lamb. Open the pressure cooker (quick release), then add the lamb, tomato paste, black pepper, balsamic vinegar, and bay leaves.
  6. Close the pressure cooker, and cook on high for around an hour.
  7. Open the pressure cooker (quick release), then boil off the excess water until the sauce thickens. Taste and adjust the salt and sugar as needed.
  8. Serve over some small size pasta 🙂

Porcini and Garlic pasta

I’ve been getting a bit lazy with writing my posts. But I still want to use this space to record recipes that tasted good. But I always feel as if to post, I need to write out some sort of grandmother story.

I decided that today I’m not going to, and make no apologies for neglecting the grandmother stories until I feel like writing them again.

Welcome to Lea’s recipe filing cabinet. Make yourself at home, nothing is in alphabetical order.

Porcini Garlic Pasta

Porcini and Garlic Pasta

Inspired by the funny packets of dried herbs you can get at the Italian supermarket, which you hydrate and it magically becomes a super tasty sauce. Unfortunately, we ran out and had to improvise. 

4-5 slices dried porcini mushrooms, crumbled
8 cloves garlic, chopped
10 large white button mushrooms, cubed
A small can of tuna steaks
1 teasp black pepper
Salt to taste

Fettucini for two

  1. Add the porcini and around half a cup of water to a frying pan. Heat it until the water boils off, rehydrating the mushrooms.
  2. Add a little oil and the garlic, and a bit of salt. Brown the garlic a little.
  3. Add the mushrooms and black pepper. Continue to cook until the water released from the mushrooms dries off. Add the tuna steaks and give it a swirl.
  4. Add the cooked pasta and mix it in over medium heat  so the pasta takes up the taste of the sauce.

Kuah kacang

Coming from someone who hardly eats or even likes kuah kacang much, the assignment to make kuah kacang for a Raya gathering can be described as a bit of a gamble.

Kuah kacang is not something that I find to be particularly notable. I don’t gravitate towards it on buffet tables. I find it too sweet and sickly, and sticky, and oily. I don’t generally dip my satay in it. I am even less keen on the Indonesian version than the Malaysian version, which is even sweeter.

I’m not selling this very well, am I?

Kacang

Perhaps I have just never had a nice homemade kuah kacang. Actually, that’s not true – I have had Bigfoot’s mother’s kuah kacang, and wasn’t hugely keen on that either, a view which flies in the face of common opinion. Please don’t tell her. I think kuah kacang just doesn’t push my buttons.

But. BUT. I did quite like this. Maybe I adulterated it beyond recognition. Maybe it is not sweet enough to be proper kuah kacang. Or perhaps too spicy, or salty. Obviously, I  don’t think so.  It could be one of those strange things where once you have put effort into it, you trick yourself into liking what you have made. But hey, my peanut sauce, my rules / choice of seasoning.

 It also went down pretty well with the rest of the deprived-of-Malaysian-food-crowd. Yay me! 

Kuah Kacang / Malaysian Peanut Sauce (Satay Sauce)

Based on Anna Qawina’s recipe, tweaked and seasoned differently

5-8 cloves garlic
1 large purple onion, or 2 smaller ones
2 stalks of lemongrass
10-20 dried chillies, washed – adjust depending on how hot you want it
A thumb’s length of ginger
A slice of toasted belacan, around 1/2 cm thick and the length of your thumb – note that I have female-length thumbs, so don’t go too crazy. Toast it gently over a flame or in a toaster oven / dry fry in a pan until the colour changes a little.

1/2 cup water
500-800g blanched peanuts, toasted or fried
1 piece of gula melaka – this is the approximate equivalent of 1/4 cup of packed brown sugar, but start low and work upwards to taste.
1 tablesp asam jawa / tamarind paste in hot water, mushed until the water turns brown
Sugar and salt, to taste

  1. Grind the garlic, onion, lemongrass, chilli, ginger, and belacan in a blender or chopper until you get a paste. Fry this over medium heat until fragrant.
  2. Chop the peanuts roughly in a chopper or blender, then add them to the pan. Add the water so the texture is closer to a sauce.  Add extra water if needed. Lower the heat slightly, and stir so that the peanuts don’t burn.
  3. Add the gula melaka/ brown sugar, and stir until it is all combined.
  4. Season with the sugar, salt, and asam jawa. I obviously added no sugar, some salt, and almost all the asam jawa.

Enjoy with some other raya food. Savour it thoroughly, because I’m only making this once a year! 🙂

Attempts to find tasty cheaper pesto: rocket hazelnut garlic pesto

I really like pesto but let’s be honest, I can’t really stomach paying a lot for a huge bunch of basil + pine nuts on a regular basis. For something like seafood, perhaps I would be more willing to pay. But not really for a herb and a nut, no matter how nice they are.

Hence the search was on to create a tasty pesto which doesn’t break the bank. Enter rocket.

Hazelnuts were substituted for the pine nuts, though I’m sure almonds and walnuts would be nice too, depending on what you can get cheaply at the time.

Cheese was removed because.. err well I ran out that day. You can put the cheese back in if you like but it masks the flavour of the garlic and hazelnuts a bit. Also depending on where you live, it might be costly too. Shavings of parmesan would probably be appreciated though.

Maybe my point is just that you can sub out basil for any green, and pine nuts for any nut, and cheese for something a bit pungent like garlic.

Or maybe I have no point and I just like garlic. That might be it too 🙂

Pretty green

Rocket hazelnut garlic pesto

Inspired by a pasta sauce a friend had at Crown Melbourne. Credit to the Kitchn for the idea of using rocket. 

A handful of hazelnuts, toasted
4-5 cloves of garlic
A big bunch of rocket
Salt, pepper, and chilli flakes to taste.

  1. Blend the garlic and hazelnut into chunks.
  2. Fry the garlic-hazelnut mix with a little salt in some olive oil until the garlic is fragrant.
  3. Return the contents of the pan (including oil) to the blender and blend in the rocket. If the mixture is a little dry, add more olive oil.
  4. Taste, add salt, pepper and chilli flakes as needed.

Attempting to copy Mrs. Yeti’s Kichidi

I first learnt of kichidi while eating at Mrs Y.’s table. I can’t believe I never knew of this before!

Funny isn’t it, comfort food takes similar forms and evokes similar feelings despite which cuisine it originates from. I think an ill version of me would be just as happy eating kichidi as Chinese porridge. Well maybe say, 80% as happy. That’s still pretty close. A healthy me would also be happy because both taste pretty good. I happily ate mine with accompanying dishes while at Mrs Y’s, when I recreated this at home I was too hungry and ate it straight from the pot. Shh.

As much as I’d like to say this is Mrs Y’s original recipe, it isn’t. This is because she appears to make it very fast and when I tried to watch her one time I lost track.

Beauty is in the eye of the beholder

Kichidi

Adapted from Padhu’s Kitchen, changing a few ingredients and the rice:dhal ratio. 

I’ve also made this recipe with loads of ingredients missing and it still tasted pretty nice – I’ve marked those that I’ve tried it without. I’d suggest you don’t try making it so bare bones that all of the stuff is left out at the same time though

1/2 cup rice
1/2 cup dhal – I used the orange dhal
2 cups water – I used 1:2 for each of the rice and dhal so check what your rice and dhal packet says 

1 teasp mustard seeds – without is okay
1 teasp cumin seeds
1/4 teasp whole black pepper (or just black pepper if you don’t have it whole)
A few curry leaves – without is okay
A pinch of hing (asafoetida) – without is okay

1 onion, chopped
2 dried chillies – technically you should use one green chilli, chopped
4 cloves garlic, crushed
1/2 a thumb of ginger, chopped
1 tomato, chopped – original recipe doesn’t have this, but it is a nice option if you want it

1/4 teasp turmeric powder – without is okay
1 teasp chilli powder
1/2 teasp coriander powder – without is okay
1/4 teasp garam masala

Other utensils: pressure cooker or a lot of patience.

  1. Fry the mustard seeds and cumin seeds in a little oil over medium heat, until they start to dance. Then, add in the black pepper, curry leaves, and hing (if using). Give it a bit of a stir until it smells nice.
  2. Add the onion, cook until it goes a bit transparant and soft.
  3. Add the ginger, garlic, and dry/fresh chilli. Fry until fragrant. Add tomato and cook until soft if using.
  4. Add all the powders, give it a quick stir for a couple of seconds.
  5. Add the rice and dhal, and fry it until coated with oil. Add some salt to taste.
  6. Add the water, and close the lid on the pressure cooker. Cook on high for 9 minutes.  If you don’t a pressure cooker, close the lid on your pot and be prepared to wait around 20 minutes. Taste and salt as needed.

After that you can garnish with fried onions, or coriander, or a top-up garnish (see the original author’s link). I didn’t do any of these because I was already happy with the taste 🙂

Descent into auntie-food (like lotus stir-fry)

Lotus root as a bit of a bad rep sometimes as being very traditional, and boring, and possibly not-food (I know some people who refuse to eat the lotus in soups as it is considered not-food and therefore not-edible).

Yes, I did get funny looks when I very excitedly found an ugly  potato-root-looking thing in the market. Yes, it was an effort to persuade Bigfoot that I did in fact want to buy this rather expensive thing that looked a bit like a petrified hotdog bun. But it was worth it in the end.

I didn’t think it was ugly at all. Or even auntie-ish. In the end, you can’t beat simple, tasty, and most importantly quick food  after a long day.

I swear it tastes good

Lotus Stir-Fry

Adapted from Just Bento’s version.

1 lotus root, peeled and sliced
2-3 cm ginger, chopped
3-5 cloves garlic (depending on size), chopped
1 bunch of spring onions, chopped into approx 1cm lengths

chilli flakes or whole red chilli, to taste – I used around 1/2 teasp red chilli flakes
1 teasp brown suger
1 teasp rice / balsamic vinegar
1-2 tablesp sesame seeds
1.5 tablesp soya sauce
2 teasp sesame oil
white pepper to taste

  1. Slice lotus root and leave it in some slightly vinegared water while preparing the other ingredients.
  2. Fry ginger and garlic in oil until fragrant, over medium heat. Drain the lotus slices and add to the pain in a single layer, flipping as needed.
  3. Add chilli, spring onions, sesame seeds, pepper, soya sauce, sesame oil, brown sugar, and vinegar. Cook until slightly caramelised.

On the Clash of Cuisines

Bigfoot and I have this problem, in that he says all Chinese food is bland and I strongly, vehemently, and occasionally violently disagree with him. And I continue to politely suggest that his taste buds have been corrupted by a lifetime of curry powder and exposure to poor quality pork-free cantonese  food.

There is a whole world (of Chinese food) out there. And I will win this personal crusade. Bit by bit, fighting tooth and nail each step of the way.

After this meal, the score stood at 5,001:0 (me being the victor. Of course, I’m also the only one keeping score, but whatever).

Preconceptions vanquished

Szechuan Eggplant with Spicy Tauchu 

Adapted from Smokywok.

2 medium sized eggplants – cut into sticks
1 cm knob salted fish – chopped
5 (small) cloves garlic – chopped
Thumb sized knob of ginger – sliced
3 stalks spring onions – chopped into 1-2 inch lengths
2 red chilli – chopped
1 teasp szechuan peppers

2 tablesp spicy tauchu (bean paste)
2 tablesp soya sauce
1.5 tablesp sugar
2 tablesp chinese black vinegar
1/4 cup water

  1. Pre-cook the eggplant – either fry it for a couple of minutes in a wok, or toast it in the toaster oven for 5 minutes. I toasted mine.
  2. In a claypot (or a pot with a lid), fry with a little oil: salted fish, garlic, ginger, spring onions, chilli, and szechuan peppers.
  3. Throw in all the sauces and the pre-cooked eggplant. Stir it up and wait for the sauce to boil.
  4. Once the sauce boils, lower the heat to medium-low, and cover with a lid. Cook for 10 minutes or so, until the eggplant is cooked and the sauce is absorbed.

The Humble Tomato

I didn’t really want to write about tomato sauce, I want to write about eggplant lasagne. Which is more awesome than I imagined, and I have snacked on it three times between lunch and dinner. It tastes good cold. My next post will be about eggplant lasagne.

I am writing about tomato sauce because Bigfoot pestered me into writing about it.

I figure: tomato sauce, who wants to read about tomato sauce. If you’re interested in tomato sauce, you probably already know how to make it and don’t need to hear my ramblings. Especially since I don’t have a proper recipe for you. If you aren’t interested in tomato sauce, you probably bought it from the supermarket last time you wanted it. In the form of tomato paste, or possibly Prego. No shaming here – in my memory Prego tastes pretty decent.

My point being, if you don’t feel like it’s worth the hassle, then to you it probably isn’t.

Why do I make my own tomato sauce then? And why always with fresh tomatoes?

These are the discount-almost-off type of tomatoes

Err. Sentimental reasons. Sort of. Also, I like the taste.

When I was in university, the dining hall food was awful. And by awful I mean really quite bad. Except for certain days, like spaghetti day.

If, because you were ill / not hungry / overly fussy *embarrassed face*, you didn’t want to eat the dining hall food, then you were allowed to exchange your meal allocation for 4 fruits. For some reason, in this university, tomatoes were classified as a fruit along with bananas and apples. To give them credit, I did see people chomp into whole tomatoes after meals so perhaps it was a cultural thing.

4 tomatoes + garlic + pasta made for a much better dinner than what I used to find in the dining hall.

I didn’t have a pot of my own back then, and the one I did borrow was lidless. And for some reason I thought that tomato sauce needed to be stirred constantly to prevent it from burning. Probably an indication that I had the heat too high, but it was therapeutic none the less.

Since then, I’ve figured this cooking business out a little bit better. But for me, on a cold evening, comfort food (with minimal effort) doesn’t get much better than a simmering pot of fresh tomato sauce.

It's so hard to make tomato sauce look attractive

Note: I used loads of tomatoes because of $1 (for a big bag of) tomatoes. Yay tomatoes!

Basic Tomato Sauce

I use variations of this in most recipes requiring some sort of tomato base, unless it’s tomato paste to be mixed into a sauce or something. Then I’d probably just buy tomato paste. 

Basic:
4 medium sized tomatoes
3-4 cloves garlic

Balsamic vinegar – for balancing. I’ve done this with white vinegar too, but be careful and use only a tiny bit as it tastes harsh.
Sugar – again, for balancing.
Olive oil

Optional: onion (up to 1/2 a small one), chilli (fresh or flakes), anchovies, various herbs, various other vegetables to flavour the sauce.

This looks long but it is really just a few steps: add garlic, add tomato, simmer, season, simmer. The rest is descriptive.

  1. Prep:
    Grab a pot with a lid, and put in a little olive oil. I use about a teaspoon. Leave the lid off, and let the oil heat over a medium-low flame. 
  2. Garlic:
    Crush your garlic and roughly chop it. As you finish chopping, add it to the pot. Stir a little and make sure it doesn’t burn.

    • At this point you can add your extras:
      • I almost always add 1/4 to 1/2 a sliced onion, depending on the size of the onion. I also usually add a sprinkle of chilli flakes.
      • I recently discovered anchovies, and sometimes add one or two small ones.
  3. Tomato:
    While the garlic + extras are cooking, chop your tomatoes. Roughly chopped is fine, they don’t need to be too small. I don’t bother blanching off the skins, as I like my sauce chunky anyway.
  4. Tomato:
    As the garlic turns golden and onions (if using) turn translucent, drop in the tomatoes. Note that garlic can burn quite quickly, but as long as you put in a couple of tomatoes before the garlic burns it’ll be fine. Apparently this has something to do with the liquid coming out of the tomato, and is called deglazing. Once all your tomatoes are in, cover the pot and crank up the heat to med-high. Make sure your lid fits well, if not you may need to add water later. If you want you can add other random vege to flavour the sauce here too – a grilled (charred) capsicum is nice, chopped roughly.
  5. Simmer:
    That’s it! Now leave it alone for 15 minutes. You don’t even have to stir, just make sure it doesn’t dry out – if so, turn down the heat a bit and add a little water.
  6. Season:
    By now your tomatoes are mushy and the beginnings of awesomeness are blossoming. Time to balance the flavour.

    • When I lived in UK / NL /and now Australia, I generally use/d very little seasoning – half a teaspoon of balsamic, perhaps a quarter of a teaspoon of sugar or less. You can also add herbs, if you feel like it. Taste and adjust until it is to your liking. Also, a little salt helps if you like that (I usually don’t salt it much).
    • Sorry Malaysia and Singapore, I love your food but your tomatoes are sour. I couldn’t figure out what was going wrong at the beginning. I generally use half to one teaspoon of balsamic, and up to a teaspoon of sugar, but don’t add it all at once, taste and adjust slowly.
  7. Simmer:
    Close the lid of the pot and keep cooking on medium for as long as you want. The longer you cook it for, the longer the humble tomato has to turn into the soothing balm that is good tomato sauce. Keep an eye on it in case it gets dry.
    If you turn the heat down to low, you can pretty much leave it alone while you figure out the rest of your food-related tasks. If it gets dry, add a little water. If you need it thicker, leave the lid off (e.g., if you use it for pizza sauce).

Mussels! I can make mussels!

I love seafood. I eat pescetarian most of the time. This is not because I’m the type of person that names all their animal friends and talks to them all the time (I am, in fact, that person – one day this will probably cause me much mental torment). It is, simply, because I like the taste of seafood much better than all other types of meat, barring specific dishes. For example, oxtail stew, lamb ragu, chicken rice, and loh mai kai. 

Mussels!!

Most of all, I love all the things that live in shells. To eat, I mean. Not just the clammy types, but prawns, scallops, shellfish, crayfish, crab *swoon*, and all the rest of them. Of course, mussels, clams, lala, oysters, and those swirly looking things in twisty shells are part of this list.

First time I ever cooked fennel

And when I realised mussels only cost $4 for 800g at the market, my reaction was predictable. Despite the fact that I don’t know how to cook mussels.  These things make me far too excited.

In honour of my favourite mussels from Brussels, I had no choice but to learn. Shock and horror, it was pretty easy to do well. Mussels are going to become my staple dinner treat. Vongole, here I come!

Now I just need a pretty pot for them

Mussels with Garlic, Fennel and Parsley

After much internetting, I realised that you can pretty much put anything in mussels providing you steam by adding at least 1/4 inch of liquid on the bottom of the pot, and closing the lid tightly until the mussels are steamed. This is a bit of an ad-libbed recipe, based on looking at roughly 500 other mussel recipes. 

800g mussels
1 onion, sliced into rings
8 cloves garlic, chopped
1 baby fennel, sliced into strips
~1 cup water
Juice of 1/2 a lemon
Salt & pepper to taste

Yield: 2 servings as a main + 2 servings the next day as a side

  1. Assuming your mussels aren’t pre-cleaned – first thing when you start, dump them in very very salty cool water on your countertop and leave them there while you prep / chop everything else, for at least 15 – 20 minutes.
    • This is to make them expel the sand they are holding on to. They are alive, and when in salt water will open up and spew out all their sand.
  2. While waiting for your mussels to expel sand, put your stock on the stove in a pot:
    • Fry the garlic until light golden, then add the onion. Lower the heat and keep going until they turn transparant.
    • Add the salt and sliced fennel. Keep cooking, the fennel might get a little charred at the edges – that’s fine.
    • Once your fennel is cooked, add the water and lemon juice. Cover the lid and let it stew until you are done with the mussels. If needed, you can add a bit more water – but let it boil down to about 1/4 inch depth from the bottom of the pan before you put the mussels in. The longer you do this for, the better it will taste. Don’t worry if it’s a bit bland now, the mussels will make it approximately 1,000,000 times tastier.
  3. The not-fun part: now that your mussels expelled all their sand, you need to clean the shells and debeard them. Do this over the sink.
    • To debeard: find the hairy weird bits poking out of the shell, and pull them all off. You might need a knife. You don’t want hairs that look like they came from someone’s armpit floating in your steamed mussels.
    • To clean: scrub hard with a dish scrubber / steel wool until the shells look clean. You may need to chip off some especially stubborn bits with a knife.
  4. You’re ready to cook your mussels! Make sure you have the right amount of liquid (about 1/4 inch depth). If not, add water / boil off. Make sure the liquid is at a rolling boil, then throw in all the clean mussels and close the lid on the pot tightly. Count around 6 minutes. Look through the lid – are the mussels open? If not you can give it a little longer. If they are, your mussels are ready!
  5. Add pepper. After that, you can either serve immediately, or you can remove the mussels and boil the stock down further before pouring it back over the cooked mussels. Your choice. I cooked mine down 🙂